Colorbond wall cladding installation is a popular choice for enhancing home and commercial building aesthetics․ Known for its durability and weather-resistant properties‚ it offers a sleek‚ modern finish․ Colorbond cladding is made from high-quality steel‚ pre-painted for long-lasting color retention and minimal maintenance․ Its versatility allows it to suit various architectural styles‚ making it a favorite in Australia․ Proper installation ensures a professional look and protects against harsh weather conditions‚ providing both functionality and visual appeal․
1․1 What is Colorbond Wall Cladding?
Colorbond wall cladding is a durable and versatile exterior cladding system made from high-quality‚ pre-painted steel․ Designed to provide a sleek and modern finish‚ it is widely used for both residential and commercial buildings․ The cladding is manufactured using a robust steel base coated with a corrosion-resistant and weatherproof finish‚ ensuring long-lasting performance․ It is available in a variety of profiles and colors‚ offering flexibility to suit different architectural designs․ Colorbond cladding is not only used for exterior walls but can also be applied to fences‚ garages‚ and other structures․ Its popularity stems from its ability to withstand harsh weather conditions‚ including heavy rain‚ UV exposure‚ and extreme temperatures‚ making it a practical choice for Australian homes․
1․2 Benefits of Using Colorbond Wall Cladding
Colorbond wall cladding offers numerous benefits‚ making it a preferred choice for homeowners and builders․ Its durable‚ weather-resistant design ensures long-lasting protection against harsh weather conditions‚ including heavy rain‚ UV exposure‚ and extreme temperatures․ The pre-painted finish provides a sleek‚ modern appearance that enhances the aesthetic appeal of any building․ Additionally‚ Colorbond cladding requires minimal maintenance‚ as it resists corrosion and fading over time․ It is also lightweight and easy to install‚ reducing labor costs and construction time․ Furthermore‚ Colorbond cladding is fire-resistant and eco-friendly‚ aligning with sustainability goals․ Its versatility in design and color options allows it to complement various architectural styles‚ making it a practical and stylish solution for exterior walls and other structures․
1․3 Why Choose Colorbond for Wall Cladding?
Colorbond is a trusted Australian brand renowned for its high-quality‚ durable‚ and visually appealing wall cladding solutions․ Its pre-painted steel cladding is designed to withstand the country’s harsh climate‚ offering exceptional resistance to corrosion‚ fading‚ and weathering․ With a wide range of modern colors‚ Colorbond allows homeowners to achieve a sleek‚ contemporary look that complements any architectural style․ Additionally‚ Colorbond cladding is lightweight‚ easy to install‚ and fire-resistant‚ making it a practical choice for both residential and commercial projects․ Its eco-friendly properties and long lifespan further enhance its appeal‚ providing a cost-effective and sustainable solution for exterior wall cladding․ By choosing Colorbond‚ you invest in a product that combines style‚ durability‚ and functionality‚ ensuring your building stands the test of time․

Planning and Preparation for Installation
Proper planning ensures a smooth installation process․ Gather tools‚ assess the site‚ measure accurately‚ and comply with local codes for a successful project․
2․1 Tools and Materials Needed for Installation
To ensure a successful Colorbond wall cladding installation‚ gather the necessary tools and materials․ Essential tools include a drill‚ screwdriver‚ measuring tape‚ level‚ and safety gear like gloves and goggles․ Materials required are Colorbond steel panels‚ fasteners‚ flashings‚ trims‚ and a sturdy framing system․ Weatherproof sealants and insulation may also be needed‚ depending on the site conditions․ Properly preparing these items beforehand avoids delays and ensures a smooth process․ Always refer to manufacturer guidelines for specific material recommendations․
2․2 Assessing the Site for Wall Cladding
Assessing the site for Colorbond wall cladding installation is crucial to ensure a smooth and successful project․ Begin by inspecting the wall surface for any structural damage‚ cracks‚ or unevenness․ Check for existing coatings‚ mold‚ or mildew‚ as these may require treatment before installation․ Verify that the wall is clean‚ dry‚ and free from debris․ Measure the wall dimensions to confirm the cladding material requirements․ Ensure the site is accessible and clear of obstacles to facilitate easy installation․ Additionally‚ evaluate the surrounding environment‚ such as exposure to weather conditions‚ to determine if extra precautions or materials are needed․ A thorough site assessment helps identify potential issues early‚ ensuring the cladding is installed securely and performs optimally․
2․3 Measuring the Wall Area for Cladding
Measuring the wall area accurately is essential for a successful Colorbond cladding installation․ Start by recording the height and width of each wall section‚ ensuring to account for any obstacles like windows or doors․ Use a tape measure to calculate the total square meterage needed‚ adding 10% to your measurements to allow for cuts and waste․ Note the number of panels required based on their standard sizes‚ typically ranging from 0․9 to 1․2 meters wide․ For complex walls‚ create a sketch to visualize panel placements and minimize waste․ Accurate measurements prevent material shortages and ensure a seamless installation process‚ saving time and resources․ Double-check your calculations to avoid errors and ensure the cladding fits perfectly․
Design Considerations for Colorbond Wall Cladding
Colorbond wall cladding offers versatile design options‚ with a wide range of colors and profiles to suit modern or traditional styles․ Choose from smooth or textured finishes‚ including matt and gloss options‚ to enhance your building’s aesthetic appeal․ Consider the architectural style‚ surrounding environment‚ and personal preferences when selecting colors and patterns․ Mixing profiles can add visual interest‚ while coordinating with other exterior elements ensures a cohesive look․ Proper alignment and spacing of panels are crucial for a polished appearance․ Design decisions should balance functionality and style to create a timeless exterior facade․ Plan carefully to achieve the desired visual impact and durability․
3․1 Choosing the Right Color for Your Cladding
Choosing the right color for your Colorbond wall cladding is a crucial step in achieving a harmonious and visually appealing exterior․ With over 22 standard colors to choose from‚ including classic neutrals and bold statement shades‚ you can match your cladding to your home’s style and surroundings․ Consider factors like the color of your roof‚ gutters‚ and nearby structures to ensure a cohesive look․ Matt and gloss finishes are available‚ offering different aesthetic effects․ Test color samples under natural light to see how they appear throughout the day․ Coordinating your cladding color with other exterior elements‚ such as windows and doors‚ will enhance the overall design; Remember‚ the color you choose will significantly impact your home’s curb appeal and long-term visual identity․
3․2 Selecting the Appropriate Profile for Your Wall
Selecting the right profile for your Colorbond wall cladding is essential to achieve the desired aesthetic and functional performance․ Colorbond cladding is available in various profiles‚ including corrugated‚ panel‚ and weatherboard designs‚ each offering unique visual and structural benefits․ Corrugated profiles provide a traditional‚ durable option with a ribbed texture‚ while panel profiles deliver a sleek‚ modern appearance․ Weatherboard profiles mimic the look of timber but with enhanced durability․ Consider the architectural style of your building‚ local weather conditions‚ and personal preferences when choosing a profile․ Ensure the selected profile aligns with your design goals and functional requirements‚ as it significantly impacts the overall look and performance of your cladding․ Proper profile selection enhances both curb appeal and long-term weather resistance․
3․3 Understanding Patterns and Textures in Colorbond
Colorbond wall cladding offers a wide range of patterns and textures‚ enabling you to customize the appearance of your exterior walls․ The most common profiles include corrugated‚ panel‚ and weatherboard designs‚ each providing a unique aesthetic․ Corrugated profiles feature a ribbed texture‚ adding depth and a traditional look‚ while panel profiles offer a smooth‚ modern finish․ Weatherboard profiles mimic the appearance of timber‚ blending seamlessly with classic designs․ Additionally‚ Colorbond cladding is available in matt and glossy finishes‚ further enhancing its visual appeal․ The combination of these patterns and textures not only improves the exterior’s curb appeal but also enhances durability‚ making it resistant to harsh weather conditions․ Understanding these options helps you make an informed decision that aligns with your architectural style and personal preferences․
Safety Precautions During Installation
Ensure all safety measures are in place during Colorbond installation‚ including proper protective gear‚ safe ladder usage‚ and adherence to weather guidelines to minimize risks․
4․1 Protective Gear and Safety Equipment
Protective gear is essential for safe Colorbond cladding installation․ Always wear safety glasses to shield eyes from debris and gloves to prevent cuts and abrasions․ Steel-capped boots protect feet from heavy tools or falling materials․ A dust mask is crucial when cutting materials to avoid inhaling dust․ If working at heights‚ a hard hat and harness are necessary to prevent head injuries and falls․ Ensure all equipment is in good condition and properly fitted․ Regularly inspect gear for wear and tear․ Using the right safety equipment minimizes risks and ensures compliance with workplace safety standards․ Never compromise on safety to avoid accidents and injuries during installation․
4․2 Weather Conditions for Safe Installation
Weather conditions play a crucial role in the safe installation of Colorbond wall cladding․ Installing in extreme heat can cause materials to expand‚ leading to improper fits‚ while heavy rain may compromise the integrity of the cladding and underlying structure․ Wind can make handling large panels dangerous‚ increasing the risk of accidents․ It’s best to install during calm‚ dry weather with moderate temperatures․ Avoid working in direct sunlight during peak hours to prevent overheating․ Ensure the wall surface is clean and dry before starting․ If rain is forecasted‚ postpone installation to prevent water damage․ Always check weather forecasts beforehand and plan accordingly to ensure a safe and successful installation process․
4․3 Safety Tips for Working at Heights
When installing Colorbond wall cladding‚ working at heights requires strict adherence to safety protocols․ Always wear a harness and ensure it is securely attached to a stable anchor point․ Use sturdy ladders or scaffolding and ensure they are properly secured․ Never lean over the side of a ladder; instead‚ move it to the desired position․ Maintain three points of contact (two hands and one foot‚ or two feet and one hand) when climbing․ Avoid overreaching‚ as this can lead to loss of balance․ Ensure the work area is clear of debris and obstructions․ Have a spotter or another person nearby to assist if needed․ Always follow the manufacturer’s guidelines for equipment and ensure all team members are trained in height safety․ Never work at heights in bad weather or when fatigued․
Step-by-Step Installation Guide
Begin by preparing the wall surface‚ then install the framing‚ secure Colorbond panels‚ add flashings‚ and finish with trims for a professional and durable result․
5․1 Preparing the Wall Surface for Cladding
Preparing the wall surface is critical for a successful Colorbond cladding installation․ Begin by cleaning the wall thoroughly to remove dirt‚ grime‚ and old adhesives․ Ensure the surface is dry and free from moisture‚ as dampness can compromise the cladding’s adherence․ Inspect the wall for cracks or damage and repair them with a suitable filler․ Sand uneven areas to create a smooth base․ If necessary‚ apply a primer to enhance adhesion and durability․ Check for any structural issues‚ such as rot or instability‚ and address them before proceeding․ A well-prepared surface ensures proper installation and maximizes the cladding’s performance and longevity․
- Clean the wall thoroughly․
- Repair cracks and damage․
- Ensure the surface is dry and even․
- Apply primer if needed․
5․2 Installing the Framing for Wall Cladding
Installing the framing for Colorbond wall cladding is a crucial step that ensures the structural integrity and stability of the installation․ Begin by attaching horizontal battens to the wall‚ spaced evenly according to the manufacturer’s specifications․ Use durable materials like timber or steel for the battens‚ and secure them firmly to the wall studs using appropriate screws or bolts․ Ensure the framing is level and plumb to maintain even support for the cladding panels․ Next‚ install vertical battens to provide additional structural support‚ aligning them with the horizontal ones for a seamless fit․ Proper spacing and alignment are essential to prevent the cladding from sagging or becoming uneven․ Use weather-resistant fasteners to secure the battens‚ ensuring they can withstand environmental conditions․ Finally‚ double-check all connections to guarantee stability and durability․
- Attach horizontal battens evenly spaced․
- Secure battens to wall studs using durable fasteners․
- Ensure framing is level and plumb․
- Install vertical battens for added support․
- Use weather-resistant materials and fasteners․
5․3 Fixing Colorbond Panels to the Wall
Fixing Colorbond panels to the wall requires precision to ensure a secure and visually appealing installation․ Begin by attaching the panels starting from the bottom of the wall‚ aligning them with the framing․ Use hex-head screws or equivalent fasteners‚ spacing them evenly (typically every 300mm) to prevent sagging․ Ensure each panel is firmly secured to the battens‚ leaving a 10mm gap between panels for thermal expansion․ Align the panels with the framing to maintain a straight and even surface․ Once all panels are in place‚ tighten the screws gently to avoid damaging the material․ Finally‚ seal any gaps between panels and surrounding structures with weatherproof sealant to ensure a watertight finish․ Regularly check alignment and tighten fasteners as needed to maintain structural integrity․
- Start installation from the bottom of the wall․
- Use hex-head screws or equivalent fasteners․
- Leave a 10mm gap between panels for expansion․
- Align panels with the framing for evenness․
- Seal gaps with weatherproof sealant․
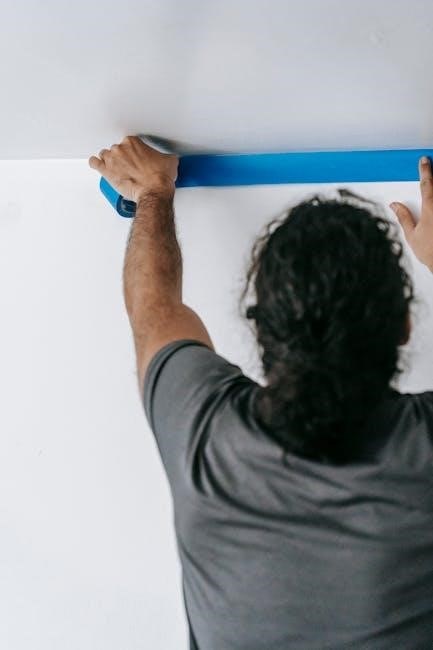
5․4 Installing Flashings and Trims
Installing flashings and trims is essential for ensuring a watertight and visually cohesive finish in Colorbond wall cladding․ Flashings are placed at joints‚ corners‚ and edges to protect against water ingress‚ while trims provide a neat‚ polished appearance․ Begin by measuring and cutting flashings to fit specific areas‚ such as windows‚ doors‚ and rooflines․ Secure them using weatherproof sealant and compatible fasteners․ Trims are then attached to cover any gaps between panels and surrounding structures‚ ensuring a seamless look․ Use materials like Colorbond steel for trims to maintain consistency in color and durability․ Apply a bead of silicone sealant along edges for added protection․ Properly installed flashings and trims not only enhance the aesthetic appeal but also prolong the lifespan of your cladding system by preventing moisture damage․
- Measure and cut flashings to fit specific areas․
- Secure flashings with weatherproof sealant and fasteners․
- Attach trims to cover gaps and edges․
- Use Colorbond steel trims for color consistency․
- Apply silicone sealant for added protection․
5․5 Finishing Touches for a Professional Look
Finishing touches are crucial to achieve a polished and professional appearance for your Colorbond wall cladding․ Start by inspecting all panels to ensure proper alignment and spacing․ Tighten any loose fasteners and verify that all flashings and trims are securely in place․ Apply a bead of silicone sealant around edges and joints to ensure weather tightness․ For a seamless look‚ install trim and molding around windows‚ doors‚ and corners․ Finally‚ apply a protective coating to the cladding if required‚ and touch up any scratches or defects with matching Colorbond paint․ Once complete‚ clean the surface to remove dirt or debris for a pristine finish․
- Inspect panels for alignment and spacing․
- Tighten fasteners and secure flashings․
- Apply silicone sealant for weatherproofing․
- Install trim and molding for a polished look․
- Touch up scratches and clean the surface․
5․6 Final Inspection and Quality Check
A thorough final inspection is essential to ensure the Colorbond wall cladding installation meets quality and safety standards․ Begin by visually inspecting all panels for proper alignment‚ secure fastening‚ and even spacing․ Check that all flashings and trims are correctly installed and sealed to prevent water ingress․ Verify that all screws are tightly secured and that no panels are damaged or bent․ Use a spirit level to ensure the cladding is straight and plumb․ Inspect all weatherproofing measures‚ such as silicone sealants‚ to ensure they are intact․ Address any defects or gaps promptly․ Once satisfied‚ clean the cladding to remove dirt or debris; Finally‚ document the inspection and provide a copy to the client for their records․ A well-executed quality check ensures long-term durability and aesthetic appeal․
- Inspect panels for alignment and damage․
- Check fasteners‚ flashings‚ and weatherproofing․
- Ensure all surfaces are clean and debris-free․
- Document the inspection for future reference․
Common Mistakes to Avoid During Installation
Common mistakes during Colorbond wall cladding installation include improper panel alignment‚ insufficient flashing‚ and incorrect fastener usage‚ which can compromise durability and weatherproofing․ Avoid these errors for a professional finish․
- Incorrect panel spacing and alignment․
- Insufficient or improperly installed flashings․
- Using the wrong fasteners or over-tightening․
6․1 Improper Alignment and Spacing of Panels
Improper alignment and spacing of Colorbond panels are common mistakes that can lead to an uneven appearance and structural issues․ Panels must be aligned precisely to ensure a seamless look and prevent water ingress․ Incorrect spacing can cause panels to shift over time‚ compromising the integrity of the cladding․ To avoid this‚ use a spirit level and measuring tape to mark positions accurately․ Always follow the manufacturer’s guidelines for spacing‚ typically 1․5 corrugations for side laps․ Additionally‚ ensure panels are straight and properly secured to the framing․ Misalignment can also lead to visible gaps‚ which may require costly rework․ Proper alignment and spacing are critical for both aesthetics and functionality‚ ensuring your Colorbond cladding performs as intended․
- Use a spirit level to ensure panels are straight․
- Measure and mark positions accurately before installation․
- Follow recommended spacing guidelines to prevent gaps․
6․2 Incorrect Use of Fasteners and Fixings
The incorrect use of fasteners and fixings is a prevalent mistake during Colorbond wall cladding installation․ Using incompatible screws or over-tightening can damage the panels‚ leading to rust or tearing․ Always use self-drilling screws specifically designed for Colorbond steel to ensure compatibility and durability․ Avoid mixing fastener types‚ as this can compromise the system’s integrity․ Proper torque specifications must be followed to prevent over-tightening‚ which can cause panel distortion․ Additionally‚ fixings should be spaced evenly‚ as uneven spacing can lead to uneven stress distribution․ Using the wrong fixings or spacing them incorrectly can void warranties and result in structural issues․ Always refer to the manufacturer’s guidelines for fastener selection and installation techniques to ensure a secure and long-lasting cladding system․
- Use self-drilling screws designed for Colorbond steel․
- Avoid over-tightening to prevent panel damage․
- Follow manufacturer-recommended torque specifications․
6․3 Insufficient Flashing and Weatherproofing
Insufficient flashing and weatherproofing are critical oversights that can lead to significant issues in Colorbond wall cladding installations․ Flashings are essential at junctions‚ such as windows‚ doors‚ and rooflines‚ to prevent water ingress․ Without proper flashing‚ moisture can seep behind panels‚ causing structural damage and corrosion․ Weatherproofing materials‚ like sealants and membranes‚ must be applied correctly to ensure a watertight seal․ Gaps between panels and surrounding structures should be thoroughly sealed to avoid water penetration․ Neglecting these steps can result in costly repairs‚ compromised insulation‚ and even mold growth․ Always follow manufacturer guidelines for flashing installation and weatherproofing techniques to maintain the integrity and durability of the cladding system․
- Install flashings at all junctions and openings․
- Apply weatherproofing materials correctly․
- Seal gaps between panels and surrounding structures․
Maintenance and Care for Colorbond Wall Cladding
Regular cleaning with mild detergents and water prevents dirt buildup․ Inspect cladding regularly for dents or rust․ Trim nearby plants and avoid harsh chemicals to maintain appearance and durability․
7․1 Cleaning and Maintaining Colorbond Surfaces
Regular cleaning is essential to maintain the appearance and durability of Colorbond wall cladding․ Use mild detergents and water to gently remove dirt and grime․ Avoid using abrasive materials or harsh chemicals‚ as they can damage the pre-painted finish․ For best results‚ clean from top to bottom to prevent streaks․ A soft cloth or sponge is recommended to wipe down surfaces․ Regular maintenance also involves inspecting for scratches or dents and addressing them promptly․ Trim nearby plants to prevent debris buildup․ Proper care ensures the cladding retains its color and protective properties‚ extending its lifespan․ By following these steps‚ you can keep your Colorbond surfaces looking like new for years to come․
7․2 Regular Inspection and Repair of Damages
Regular inspections are crucial to ensure the longevity and performance of Colorbond wall cladding․ Check for dents‚ scratches‚ or faded areas‚ as these can compromise the protective coating․ Inspect seams‚ flashings‚ and fasteners for tightness and integrity․ Addressing minor damage promptly prevents water infiltration and corrosion․ For small scratches‚ apply Colorbond touch-up paint to maintain the finish․ Severely damaged panels should be replaced to avoid structural weakness․ Trim back overgrown vegetation to prevent abrasion․ Regular inspections help identify potential issues before they escalate‚ ensuring the cladding remains weather-tight and visually appealing․ Schedule inspections annually or after extreme weather events to maintain optimal condition․
7․3 Tips for Longevity of Colorbond Cladding
To ensure the longevity of Colorbond cladding‚ regular maintenance and care are essential․ Avoid using harsh chemicals or abrasive cleaners‚ as they can damage the protective coating․ Instead‚ clean the cladding with mild soap and water to remove dirt and grime․ Trim back vegetation to prevent scratches and abrasion․ Avoid leaning objects against the cladding‚ as this can cause dents or scratches․ Use touch-up paint on minor scratches to prevent rust․ Ensure proper drainage around the building to avoid water pooling‚ which can lead to corrosion․ Avoid pressure washing‚ as it may damage the finish․ By following these tips‚ you can maintain the appearance and durability of your Colorbond cladding for years to come․
Colorbond wall cladding offers a durable‚ stylish solution for exterior walls‚ enhancing both functionality and curb appeal when installed correctly․ Proper maintenance ensures long-term performance and aesthetic retention․
8․1 Summary of Key Installation Steps
Installing Colorbond wall cladding involves several critical steps to ensure a professional and durable finish․ Begin by preparing the wall surface‚ ensuring it is clean‚ dry‚ and free from obstructions․ Next‚ install the framing to provide structural support for the cladding panels․ Secure the Colorbond panels to the framing using appropriate fasteners‚ aligning them properly to avoid gaps or misalignment․ Install flashings and trims to seal edges and corners‚ ensuring weatherproofing․ Finish with a thorough inspection to address any imperfections․ Finally‚ conduct a quality check to verify all components are securely fastened and the installation meets safety and aesthetic standards․ Proper execution of these steps guarantees a long-lasting and visually appealing result․
8․2 Benefits of Proper Colorbond Installation
Proper Colorbond wall cladding installation offers numerous benefits‚ including enhanced durability and long-term performance․ A well-executed installation ensures the cladding remains weather-tight‚ resisting rain‚ wind‚ and extreme temperatures․ It also improves energy efficiency by providing an additional layer of insulation‚ reducing heat transfer‚ and lowering energy costs․ Properly installed Colorbond cladding boosts the structural integrity of the building and enhances its curb appeal‚ adding value to the property․ Additionally‚ it minimizes maintenance needs‚ as the pre-painted steel resists fading and damage․ A professional installation also ensures compliance with safety standards‚ protecting against fire‚ pests‚ and moisture-related issues․ Overall‚ proper installation maximizes the potential of Colorbond cladding‚ delivering both functional and aesthetic benefits for years to come․
8․3 Final Tips for a Successful Project
For a successful Colorbond wall cladding installation‚ start by meticulously planning and measuring the site to ensure accuracy․ Always use high-quality materials and tools recommended by professionals․ Follow the manufacturer’s guidelines strictly to avoid costly mistakes․ Weather conditions play a crucial role‚ so schedule installation during calm‚ dry days to ensure proper adhesion and finish․ Regularly inspect and maintain the cladding to prolong its lifespan․ Engage experienced installers if unsure about any step‚ as improper techniques can compromise durability․ Finally‚ conduct a thorough final inspection to address any gaps‚ misalignments‚ or damage before completing the project․ These steps will ensure a seamless and professional outcome‚ enhancing both the functionality and aesthetic appeal of your property for years to come․